Sc4SAPCmd - Command line tool: The individual task types
UnlockUser

Same as in the dialog function you can choose, whether the specified users are to be unlocked or all others.
For the first case fill the <Users> tag with a list of users, separated by comma.
For the second case use the <UsersExcluded> tag. All users of the system / client will be determined and, except the given users in the <UsersExcluded> tag, will be unlocked. A common use case for this is to unlock users after a maintenance / upgrade / system refresh: just put the SAP* user into the <UsersExcluded> tag to unlock all users except SAP*.
With
<RemoveValidityRange>true</RemoveValidityRange>
you can also remove a possibly given validity range in the user master data for the touched users.
Example 1:
<ExecutionChain>
<ID>309823590</ID>
<Comment>Unlocking SAP user, generated by ChatBot system in chat #309823590</Comment>
<Task>
<UnlockUser StopOnError="false">
<Connection>PX1/100, User Self service</Connection>
<Users>mbrink</Users>
<RemoveValidityRange>true</RemoveValidityRange>
</UnlockUser>
</Task>
</ExecutionChain>
Example 2:
<ExecutionChain>
...
<Task>
<UnlockUser StopOnError="false">
<Comment>Unlocking all users after system refresh except SAP*</Comment>
<UsersExcluded>SAP*</UsersExcluded>
</UnlockUser>
</Task>
...
</ExecutionChain>
LockUser

Like in the dialog function and in the "UnlockUser" task you can choose, whether the action is to be done for specified users (<Users>) or for all others except the specified (<UsersExcluded>). The user ID's are to be given separated by comma.
Example:
<ExecutionChain>
...
<Task>
<LockUser StopOnError="false">
<Comment>Locking all users except the basis admins, the emergency user and a system user for basis stuff</Comment>
<Connection>QX1/100, SYS_BC_01</Connection>
<UsersExcluded>mbrink,jmodaal,EM_ADMIN,SYS_BC_01</UsersExcluded>
</LockUser>
</Task>
...
</ExecutionChain>
SetPassword

Like in the dialog function it makes a difference if you want to assign the same password to users or if you want to assign individual passwords.
Example for setting the same password to users:
<ExecutionChain>
...
<Task>
<SetPassword StopOnError="false">
<Comment>Assign published password to test users for start of test phase #3</Comment>
<SetSamePassword>
<Password>TP3-ReadySteadyGo!</Password>
<User>TEST_APO_01,TEST_ARC_01,TEST_BW_01,TEST_CO_01,TEST_CO_02</User>
</SetSamePassword>
</SetPassword>
</Task>
...
</ExecutionChain>
Example for setting individual passwords:
<ExecutionChain>
<ID>309816689</ID>
<Comment>Assign new password to SAP user, generated by ChatBot system in chat #309816689</Comment>
<Task>
<SetPassword StopOnError="false">
<Connection>PX1/100, User Self service</Connection>
<SetIndividualPassword>
<GeneratePw>true</GeneratePw>
<User>mbrink</User>
</SetIndividualPassword>
</SetPassword>
</Task>
</ExecutionChain>
Here a generated password will be assigned to the user. As written above the XML file will be enriched with information after the execution, so you will find the password in the <Result> tag afterwards.
When assigning already given individual passwords you have 2 options:
Option 1: You can either specify all users in the <User> tag, separated by commas, and their passwords in the <Passwords> tag, also separated by commas. This is similar to the dialog function, where you specify users on the left and passwords on the right, separated by a line break. Here it is a comma instead of a line break.
Example:
<ExecutionChain>
...
<Task>
<SetPassword StopOnError="false">
<Comment>Assign published passwords to Test users</Comment>
<Connection>PX1/100, SRV_SC4SAP</Connection>
<SetIndividualPassword>
<GeneratePw>false</GeneratePw>
<User>TEST_LE_01,TEST_LE_02,TEST_MDM_01,TEST_MDM_02</User>
<Passwords>LE01HaveFun,LE02HaveFun,MDM01HaveFun,MDM02HaveFun</Passwords>
</SetIndividualPassword>
</SetPassword>
</Task>
...
</ExecutionChain>
Option 2: You can specify pairs of user and password in the <UserAndPassword> tags.
Example (does the same as the previous example, only using another notation):
<ExecutionChain>
...
<Task>
<SetPassword StopOnError="false">
<Comment>Assign published passwords to Test users</Comment>
<Connection>PX1/100, SRV_SC4SAP</Connection>
<SetIndividualPassword>
<GeneratePw>false</GeneratePw>
<UserAndPassword>
<User>TEST_LE_01</User>
<Password>LE01HaveFun</Password>
</UserAndPassword>
<UserAndPassword>
<User>TEST_LE_02</User>
<Password>LE02HaveFun</Password>
</UserAndPassword>
<UserAndPassword>
<User>TEST_MDM_01</User>
<Password>MDM01HaveFun</Password>
</UserAndPassword>
<UserAndPassword>
<User>TEST_MDM_02</User>
<Password>MDM02HaveFun</Password>
</UserAndPassword>
</SetIndividualPassword>
</SetPassword>
</Task>
...
</ExecutionChain>
CopyUser

Like in the dialog function there are 3 options to copy users:
- From an SAP system/client to another one -> use <CopyUserSAP2SAP> tag
- From an SAP system/client into a file -> use <CopyUserSAP2File> tag
- From a file into an SAP system/client -> use <CopyUserFile2SAP> tag
Example for case #1, <CopyUserSAP2SAP>. All users will be read from the <SourceConnection>. As the <OverwriteExistingUsers> tag is set to false, only users will be copied that do not exist yet in the <TargetConnection>. No <InitialPassword> is given, therefore it will be generated. All segments of the user master data and also the role and profile assignments will be copied (tag <CopyUserSegmentFlags>). Tag <CopyUserLicenseSettings> is optional, here we use it for cost / license reasons. The copied users will be created with the license information, that they are already charged via system and client according to the <SourceConnection>.
<ExecutionChain>
...
<Task>
<CopyUser StopOnError="false">
<Comment>Enrich QX1/100 by users from PX1/100 to get complete user master data and auths</Comment>
<CopyUserSAP2SAP>
<SourceConnection>PX1/100, SRV_SC4SAP</SourceConnection>
<TargetConnection>QX1/100, SRV_SC4SAP</TargetConnection>
<User>*</User>
<OverwriteExistingUsers>false</OverwriteExistingUsers>
<CopyUserSegmentFlags Alias="true" CommData="true" Company="true" Defaults="true" Description="true" ExtID="true" Groups="true" License="true" Lockflag="true" Parameter="true" ProfileAssignment="true" RefUser="true" RoleAssignment="true" SNC="true"/>
<CopyUserLicenseSettings>
<SetUserType11>true</SetUserType11>
<ChargeableSID>PX1</ChargeableSID>
<ChargeableClient>100</ChargeableClient>
<ForAllUsers>true</ForAllUsers>
</CopyUserLicenseSettings>
</CopyUserSAP2SAP>
</CopyUser>
</Task>
...
</ExecutionChain>
Example for case #2, <CopyUserSAP2File>. All users with all segments in system QX1/100 (specified in the <Connection>) will be copied into a file.
<ExecutionChain>
...
<Task>
<CopyUser StopOnError="false">
<Comment>Backup all users in QX1/100 to file E:\SAP\System refresh\QX1\QX1-100 user.bin</Comment>
<CopyUserSAP2File>
<Connection>QX1/100, SRV_SC4SAP</Connection>
<File>E:\SAP\System refresh\QX1-100 user.bin</File>
<User>*</User>
<CopyUserSegmentFlags Alias="true" CommData="true" Company="true" Defaults="true" Description="true" ExtID="true" Groups="true" License="true" Lockflag="true" Parameter="true" ProfileAssignment="true" RefUser="true" RoleAssignment="true" SNC="true"/>
</CopyUserSAP2File>
</CopyUser>
</Task>
...
</ExecutionChain>
Example for case #3, <CopyUserFile2SAP>. Specified users from a file will be copied into QX1/100, only in case they do not exist (<OverwriteExistingUsers> = false).
<ExecutionChain>
...
<Task>
<CopyUser StopOnError="false">
<Comment>Restore system users QX1/100</Comment>
<CopyUserFile2SAP>
<File>E:\SAP\System refresh\QX1\QX1-100 user.bin</File>
<Connection>QX1/100, SRV_SC4SAP</Connection>
<User>ADS_QDS011, BODS_XBC, BWREM_QB1, BWREM_QB8, SY_BTCH_01, SY_BTCH_02, SY_EDI_01, SY_FIBTCH_01, SY_FIBTCH_02, SY_GOODSM_01, SY_RFID_01, SY_SD_01_EN, SY_SD_02_DE, SYS_BC_01, SYS_BTCH_01, SYS_CO_01, SYS_EDIMAN, SYS_FI_01, SYS_LBLPRINT, SYS_LICMAN, SYS_QB3100, SYS_QB3200, SYS_QH3100, SYS_QT3100, SYS_SCAN_474, SYS_SCAN_485, SYS_SCAN_488, SYS_SCAN_520, SYS_SD_01, TMSADM, WF-BATCH</User>
<OverwriteExistingUsers>false</OverwriteExistingUsers>
<CopyUserSegmentFlags Alias="true" CommData="true" Company="true" Defaults="true" Description="true" ExtID="true" Groups="true" License="true" Lockflag="true" Parameter="true" ProfileAssignment="true" RefUser="true" RoleAssignment="true" SNC="true"/>
</CopyUserFile2SAP>
</CopyUser>
</Task>
...
</ExecutionChain>
CreateUser

The users to be created are to be given in the <User> tag, separated by comma. You can specify an initial password in the <Password> tag or - by leaving it out - let the system generate it.
Example:
<ExecutionChain>
...
<Task>
<CreateUser StopOnError="false">
<Comment>Create test users in QX1/100</Comment>
<Connection>QX1/100, SYS_BC_01</Connection>
<User>TEST_APO_01, TEST_ARC_01, TEST_BW_01, TEST_CO_01, TEST_CO_02, TEST_FI_01, TEST_FIAA_01, TEST_LE_01, TEST_LE_02, TEST_MDM_01, TEST_MDM_02, TEST_MM_01, TEST_MM_02, TEST_PDM_01</User>
<Password>initial123</Password>
</CreateUser>
</Task>
...
</ExecutionChain>
AssignRoleOrProfile

Multiple users can be specified in <User>, separated by comma. The <Role> can be of any type (composite or single). <FromDate> and <ToDate> are to be given in this format: YYYY-MM-DD.
Example:
<ExecutionChain>
<ID>4387923</ID>
<Comment>Assigning role as requested and approved in order 4387923</Comment>
<Task>
<AssignRoleOrProfile StopOnError="false">
<Connection>PX1/100, SYS_BC_01</Connection>
<User>mbrink</User>
<Role>Z_SAP_UI2_ADMIN</Role>
<FromDate>2023-08-01</FromDate>
<ToDate>2023-12-31</ToDate>
</AssignRoleOrProfile>
</Task>
</ExecutionChain>
If a profile is to be assigned, the parts for role assignment (role name and validity range) can be left out.
Example:
<ExecutionChain>
...
<Task>
<AssignRoleOrProfile StopOnError="false">
<Comment>Assign SAP_NEW</Comment>
<Connection>PX1/100, SYS_BC_01</Connection>
<User>mbrink</User>
<Profile>SAP_NEW</Profile>
</AssignRoleOrProfile>
</Task>
...
</ExecutionChain>
RemoveRoleOrProfile

This is very similar to the "AssignRoleOrProfile" task. Due to the validity ranges of roles, it could be that there are multiple assignments of the same role. The "RemoveRoleOrProfile" task will delete all assignments of the role from the user.
Example:
<ExecutionChain>
<ID>4465411</ID>
<Comment>Removal of role as requested in order 4465411</Comment>
<Task>
<RemoveRoleOrProfile StopOnError="false">
<Connection>PX1/100, SYS_BC_01</Connection>
<User>mbrink</User>
<Role>Z_SAP_UI2_ADMIN</Role>
</RemoveRoleOrProfile>
</Task>
</ExecutionChain>
AddHiddenAuths / RemoveHiddenAuths


There is less need to use these tasks. Nevertheless, to complete the picture, they do exist. The notation is very similar to the "AssignRoleOrProfile" / "RemoveRoleOrProfile" tasks, but there is no validity range for role authorizations, therefore the <FromDate> and <ToDate> tags do not exist. Like in the dialog function it is also possible to assign full authorization of an authorization object (tag <AuthObject>).
Example:
<ExecutionChain>
...
<Task>
<AddHiddenAuths StopOnError="false">
<Comment>Assign authorization for Z_BL_MAINT (which developer has forgotten in role design :-( )</Comment>
<Connection>QX1/100, SYS_BC_01</Connection>
<User>mbrink</User>
<AuthObject>Z_BL_MAINT</AuthObject>
</AddHiddenAuths>
</Task>
...
</ExecutionChain>
ViewTableData

This task is useful for extracting table data into a file.
Example:
<ExecutionChain>
...
<Task>
<ViewTableData StopOnError="false">
<Comment>Get the role assignments in a file</Comment>
<Connection>PX1/100, SYS_BC_01</Connection>
<Table>agr_users</Table>
<MaxRows>0</MaxRows>
<OutputFile>E:\SAP\Reports\PX1 Role assignments.txt</OutputFile>
<WithSAPGUI>false</WithSAPGUI>
</ViewTableData>
</Task>
...
</ExecutionChain>
In <MaxRows> you can specify a limit of records to be read (0 - 999999). A value '0' means no limit.
The typical use case is to extract table data into a file, specified in the <OutputFile> tag. You can also use this task for starting a GUI session, showing the data (<WithSAPGUI>true), but in that case consider that the execution chain will not be continued until the dialog session is closed (manually).
In case you have set <WithSAPGUI> to true, of course a connection using a user with dialog capabilities is necessary.
If you have specified an <OutputFile>, no user with dialog capabilities in the connection is necessary.
Depending on the file extension of the filename the structure of the file differs: when specifying the file with .csv at the end, you will get a comma separated file with headers that can be easily used with Microsoft Excel or other spreadsheet applications. With another file extension (.txt, .dat or others) you will get an output as plain text, corresponding to the table structure without headers, keeping the length for each field according to the type definitions in the table.
Output using the csv format:

Output as plain text:

UpdateTableData

The <Client> has to be given for client-dependent tables. For client-independent tables it can be left out.
Each field that has to be updated has to be specified with its new value in a <Fields> tag, containing the <Name> of the field and the new <Value>.
For restricting the update to specific records in the table, you can specify a condition in the <WhereCond> tag.
Example (updating the field MAINTSYSTEM in table ZCUST_BLACKLIST in client 100 with value 'QX1100' for all records where MAINTSYSTEM is equal to 'PX1100'):
<ExecutionChain>
...
<Task>
<UpdateTableData StopOnError="false">
<Comment>Adjust maintenance system in customer blacklist after copying from PX1 to QX1</Comment>
<Connection>QX1/100, SRV_SC4SAP</Connection>
<Client>100</Client>
<Table>ZCUST_BLACKLIST</Table>
<Fields>
<Name>MAINTSYSTEM</Name>
<Value>'QX1100'</Value>
</Fields>
<WhereCond>MAINTSYSTEM = 'PX1100'</WhereCond>
</UpdateTableData>
</Task>
...
</ExecutionChain>
DeleteTableData

This task is similar to the "UpdateTableData" task. In case the table is client-dependent, the <Client> has to be specified.
For restricting the deletion to specific records in the table, you can specify a condition in the <WhereCond> tag.
Example (deleting developer keys in the systems except for emergency users):
<ExecutionChain>
<Comment>Solving security issue reg. developer keys: delete DEVACCESS except for emergency users</Comment>
<Task>
<DeleteTableData StopOnError="false">
<Connection>PX1/100, SYS_BC_01</Connection>
<Table>DEVACCESS</Table>
<WhereCond>UNAME NOT LIKE 'EM_%'</WhereCond>
</DeleteTableData>
</Task>
<Task>
<DeleteTableData StopOnError="false">
<Connection>PX2/100, SYS_BC_01</Connection>
<Table>DEVACCESS</Table>
<WhereCond>UNAME NOT LIKE 'EM_%'</WhereCond>
</DeleteTableData>
</Task>
<Task>
<DeleteTableData StopOnError="false">
<Connection>PT1/100, SYS_BC_01</Connection>
<Table>DEVACCESS</Table>
<WhereCond>UNAME NOT LIKE 'EM_%'</WhereCond>
</DeleteTableData>
</Task>
...
</ExecutionChain>
DownloadTableData

For this task a user with dialog capabilities in the connection is necessary. Specify a table in the <Table> tag. If the table is client-dependent, you have to specify also the client in the <Client> tag. For restricting the download to specific records of the table, you can specify a condition in the <WhereCond> tag.
The output file is to be given in the <File> tag. Furthermore you have to specify the <FileType>: 'ASC' or 'BIN' or 'DAT'.
Example (download of the Login Screen):
<ExecutionChain>
<Comment>Download Login screen</Comment>
<DefaultConnection>QX1/100, admin</DefaultConnection>
<!-- Save Login Screen from tables DOKIL, DOKHL and DOKTL -->
<Task>
<DownloadTableData StopOnError="false">
<File>E:\SAP\System refresh\QX1\DOKIL.bin</File>
<Filetype>BIN</Filetype>
<Table>DOKIL</Table>
<WhereCond>ID = 'TX' and OBJECT = 'ZLOGIN_SCREEN_INFO'</WhereCond>
</DownloadTableData>
</Task>
<Task>
<DownloadTableData StopOnError="false">
<File>E:\SAP\System refresh\QX1\DOKHL.bin</File>
<Filetype>BIN</Filetype>
<Table>DOKHL</Table>
<WhereCond>ID = 'TX' and OBJECT = 'ZLOGIN_SCREEN_INFO'</WhereCond>
</DownloadTableData>
</Task>
<Task>
<DownloadTableData StopOnError="false">
<File>E:\SAP\System refresh\QX1\DOKTL.bin</File>
<Filetype>BIN</Filetype>
<Table>DOKTL</Table>
<WhereCond>ID = 'TX' and OBJECT = 'ZLOGIN_SCREEN_INFO'</WhereCond>
</DownloadTableData>
</Task>
</ExecutionChain>
UploadTableData

This task is very similar to the "DownloadTableData" task. Also for this task a user with dialog capabilities in the connection is necessary. Specify the table in the <Table> tag. Different from the "DownloadTableData" task the specification of a client is not possible! If the table is client-dependent, you have to use a connection addressing the targeted client.
The "UploadTableData" task will not overwrite existing records until you allow it with the <Overwrite> tag (set it to true). If it is not set (default value is false) and the uploaded data has the same primary key as the existing data in the table, you will receive appropriate information and the task fails.
Example (upload of the Login screen):
<ExecutionChain>
<Comment>Upload Login screen</Comment>
<DefaultConnection>QX1/100, admin</DefaultConnection>
<!-- Upload Login Screen in tables DOKIL, DOKHL and DOKTL -->
<Task>
<UploadTableData StopOnError="false">
<File>E:\SAP\System refresh\QX1\DOKIL.bin</File>
<Filetype>BIN</Filetype>
<Table>DOKIL</Table>
<Overwrite>true</Overwrite>
</UploadTableData>
</Task>
<Task>
<UploadTableData StopOnError="false">
<File>E:\SAP\System refresh\QX1\DOKHL.bin</File>
<Filetype>BIN</Filetype>
<Table>DOKHL</Table>
<Overwrite>true</Overwrite>
</UploadTableData>
</Task>
<Task>
<UploadTableData StopOnError="false">
<File>E:\SAP\System refresh\QX1\DOKTL.bin</File>
<Filetype>BIN</Filetype>
<Table>DOKTL</Table>
<Overwrite>true</Overwrite>
</UploadTableData>
</Task>
</ExecutionChain>
R3trans

Like in the dialog task you have to choose between "Export", "Import" and "Remove". Whereas "Export" and "Import" need the specification of a file containing the data, the "Remove" function does not - here you have to specify a log file.
Data file and log file can be placed on the SAP server or on the frontend (meaning a storage location accessible from the computer where "Shortcut for SAP systems" is running - so it can also be a network directory). Use tag <ServerFile> or <LocalFile> (resp. <ServerLogFile> / <LocalLogFile>) to determine that (otherwise you will receive an error message at runtime and the task will fail). If you choose <Local...>, you need a user with dialog capabilities in the connection.
Similar to the dialog function there are variables for addressing DIR_HOME, DIR_TEMP and DIR_TRANS.
You can process up to 500 tables, to be specified in the <Table> tag (multiple tables separated by comma).
In case there is a client-dependent table given, you also have to specify the client in the <Client> tag. <Client>*</Client> means all clients.
Example (saving logical paths and files in front of a system refresh via Export to a file in DIR_HOME/systemrefresh):
<ExecutionChain>
<Comment>Save system specific data of QX1 before system refresh from PX1</Comment>
<DefaultConnection>QX1/100, admin</DefaultConnection>
...
<Task>
<R3trans StopOnError="false">
<Comment>Export FILE</Comment>
<Export>
<Table>FILENAME,FILENAMECI,FILEPATH,FILESYS,FILETEXT,FILETEXTCI,FSYSTXT,OPSYSTEM,OPTEXT,PARAMVALUE,PATH,PATHTEXT,USER_DIR</Table>
<Client>*</Client>
<ServerFile>$dir_home$systemrefresh/FILE.r3trans.bin</ServerFile>
<UmodeIgnore>true</UmodeIgnore>
<DeleteBeforeImport>true</DeleteBeforeImport>
</Export>
</R3trans>
</Task>
...
</ExecutionChain>
Example for removing data (as none of the tables is client-dependent, no <Client> tag is necessary):
<ExecutionChain>
<Comment>Post work system refresh PX1 to QX1, part 1: Data cleanup</Comment>
<DefaultConnection>QX1/100, admin</DefaultConnection>
...
<Task>
<R3trans StopOnError="false">
<Comment>Remove LOGONGROUP</Comment>
<Remove>
<Table>RZLLICLASS,RZLLITAB</Table>
<ServerLogFile>$dir_home$systemrefresh/LOGONGROUP.r3trans.remove.log</ServerLogFile>
</Remove>
</R3trans>
</Task>
...
</ExecutionChain>
Example for importing data (same data as exported before):
<ExecutionChain>
<Comment>Post work system refresh PX1 to QX1, part 1: Data cleanup</Comment>
<DefaultConnection>QX1/100, admin</DefaultConnection>
..
<Task>
<R3trans StopOnError="false">
<Comment>Import FILE</Comment>
<Import>
<Table>FILENAME,FILENAMECI,FILEPATH,FILESYS,FILETEXT,FILETEXTCI,FSYSTXT,OPSYSTEM,OPTEXT,PARAMVALUE,PATH,PATHTEXT,USER_DIR</Table>
<Client>*</Client>
<ServerFile>$dir_home$systemrefresh/FILE.r3trans.bin</ServerFile>
<UmodeIgnore>true</UmodeIgnore>
</Import>
</R3trans>
</Task>
...
</ExecutionChain>
R3trans will end with return code 4 if
- nothing was done: if no data was processed (table is empty or does not contain data for the given client)
- at the import it was found, that the data file was created on the same system (which is quite normal in the context of a system refresh).
However, you should have a look into the log files (samples). A log file is created nearby the data file (with ending .export.log resp. .import.log).
InsertProgram

<ABAPProgram>: the name of the ABAP program to be inserted (likely starting with Z or Y).
<ProgramTitle>: the title of the ABAP program
<SourceFile>: the absolute path to the (frontend) file containing the ABAP sourcecode.
<Overwrite>: true, if an existing program is to be overwritten.
<Execute>: true, if you want to execute the program directly after it has been inserted.
<WithSAPGUI>: only relevant, if <Execute> is set to true.
<OutputFile>: only relevant, if <Execute> is set to true. Specify a file (absolute path to a (frontend) file) to receive the output of the executed program.
Example (inserting an ABAP program with name Z_CROSS_SYSTEM_QUERY, executing it and receiving the output into a file):
<ExecutionChain>
<Comment>Cross system query: get users with last login
in the last 90 days in every client in the sandbox systems
to find systems that can be (possibly) deleted.</Comment>
<Task>
<InsertProgram StopOnError="false">
<Connection>SX1/100, SYS_BC_01</Connection>
<ABAPProgram>Z_CROSS_SYSTEM_QUERY</ABAPProgram>
<ProgramTitle>Cross system query</ProgramTitle>
<SourceFile>E:\SAP\Reports\Z_GET_LAST_LOGIN_DATES.txt</SourceFile>
<Overwrite>true</Overwrite>
<Execute>true</Execute>
<WithSAPGUI>false</WithSAPGUI>
<OutputFile>E:\SAP\Reports\Last login dates SX1.txt</OutputFile>
</InsertProgram>
</Task>
<Task>
<InsertProgram StopOnError="false">
<Connection>SX2/100, SYS_BC_01</Connection>
<ABAPProgram>Z_CROSS_SYSTEM_QUERY</ABAPProgram>
<ProgramTitle>Cross system query</ProgramTitle>
<SourceFile>E:\SAP\Reports\Z_GET_LAST_LOGIN_DATES.txt</SourceFile>
<Overwrite>true</Overwrite>
<Execute>true</Execute>
<WithSAPGUI>false</WithSAPGUI>
<OutputFile>E:\SAP\Reports\Last login dates SX2.txt</OutputFile>
</InsertProgram>
</Task>
...</ExecutionChain>
ExecProgram

This is similar to the task "InsertProgram" some lines above.
<ABAPProgram>: the name of the ABAP program to be executed
<ABAPVariant>: the variant of the ABAP program (optional - if the program is to be executed without variant, leave this out or empty)
<OutputFile>: if you want to receive the output of the program into a file, specify the file here.
<WithSAPGUI>: if you want to start a dialog session, set this field to true. Consider that the execution chain will not continue until the dialog session is closed (manually).
Example (executing a user list in some systems and store the result in files):
<ExecutionChain>
<Comment>Get a user list from each sandbox system</Comment>
<Task>
<ExecProgram StopOnError="false">
<Connection>SX1/100, SYS_BC_01</Connection>
<ABAPProgram>RSUSR200</ABAPProgram>
<OutputFile>E:\SAP\Reports\Userlist_SX1-100.txt</OutputFile>
</ExecProgram>
</Task>
<Task>
<ExecProgram StopOnError="false">
<Connection>SX2/100, SYS_BC_01</Connection>
<ABAPProgram>RSUSR200</ABAPProgram>
<OutputFile>E:\SAP\Reports\Userlist_SX2-100.txt</OutputFile>
</ExecProgram>
</Task>
...
</ExecutionChain>
DownloadFile

<ServerFile>: the name of the file on the SAP server (full path) to be downloaded. Variables for addressing DIR_HOME, DIR_TEMP and DIR_TRANS are available (see example).
<LocalFile>: the name of the file on the frontend (full path - can also be on a network directory, accessible from the computer where "Shortcut for SAP systems" is running)
<TransferMode>: ASC or BIN
<Append>: set this field to true, if you want to append the downloaded content to the local file. Default: false
<SplitSizeMB>: useful for dealing with huge files, specifies the maximum capacity of a file part in Megabytes. The local files will be named ....Part2, ....Part3 etc. When using the "Upload file" function the files will be concatenated again on the server.
Find here an example, used for a file transfer from PX1 to PX2. Notice the StopOnError attribute: it is set to true - if the download fails, the execution chain stops and prevents the file on PX2 to be overwritten with possibly invalid / empty content.
<ExecutionChain>
<Comment>Transfer VDA Audi file from PX1 to PX2</Comment>
<Task>
<DownloadFile StopOnError="true">
<Connection>PX1/100, SRV_SC4SAP</Connection>
<ServerFile>$dir_home$FTP_in/VDA_Audi.txt</ServerFile>
<LocalFile>E:\SAP\Transfer\VDA_Audi.txt</LocalFile>
<TransferMode>BIN</TransferMode>
<Append>false</Append>
<SplitSizeMB>0</SplitSizeMB>
</DownloadFile>
</Task>
<Task>
<UploadFile StopOnError="false">
<Connection>PX2/100, SRV_SC4SAP</Connection>
<ServerFile>$dir_home$FTP_in/VDA_Audi.txt</ServerFile>
<LocalFile>E:\SAP\Transfer\VDA_Audi.txt</LocalFile>
<TransferMode>BIN</TransferMode>
<Append>false</Append>
<Overwrite>true</Overwrite>
</UploadFile>
</Task>
</ExecutionChain>
UploadFile
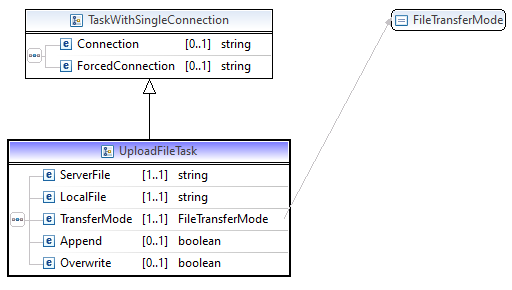
This task is related to the "Download file" task some lines above.
<ServerFile>: the name of the file on the SAP server (full path) to be uploaded. Variables for addressing DIR_HOME, DIR_TEMP and DIR_TRANS are available (see example).
<LocalFile>: the name of the file on the frontend (full path - can also be on a network directory, accessible from the computer where "Shortcut for SAP systems" is running)
<TransferMode>: ASC or BIN
<Append>: set this field to true, if you want to append the uploaded content to the server file. Default: false
<Overwrite>: set this field to true in case you want to overwrite the server file.
Example: see example in "DownloadFile" chapter some lines above.